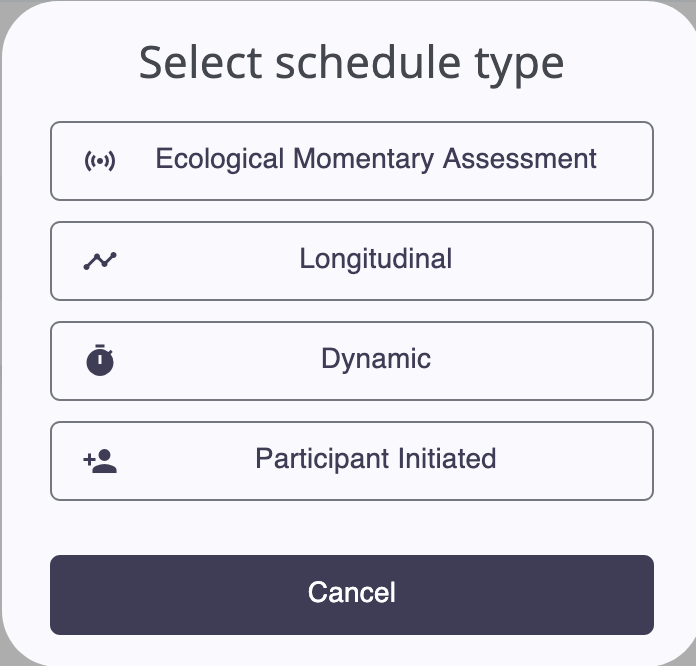
There are four types of schedules within Inclivio that allow you to achieve different goals:
Ecological Momentary Assessment allow you to send multiple pings per day to your participants based on the parameters you set. Choose this schedule if you plan to send 2+ pings on at least one day in your study.
Longitudinal schedules allow you to implement long-term longitudinal assessments in Inclivio. Longitudinal schedules allow you to go several days without sending pings, whereas this is not possible in ESM/EMA schedules. The primary difference between longitudinal schedules and ESM/EMA schedules is that you can skip days in longitudinal schedules (e.g., send pings 1 day/week).
Dynamic schedules are event-contingent schedules based on time-since-activation rather than time-of-day. Dynamic schedules are useful when you want to assess certain episodes (e.g., drinking episodes, heightened suicidality) that do not occur at a predictable time.
Participant Initiated schedules are event-contingent assessments that the participant self-initiates by clicking on a button on their Inclivio home page. Participant initiated schedules do not incur costs, and pass on relevant meta-data to your survey (e.g., participantid, scheduleid).
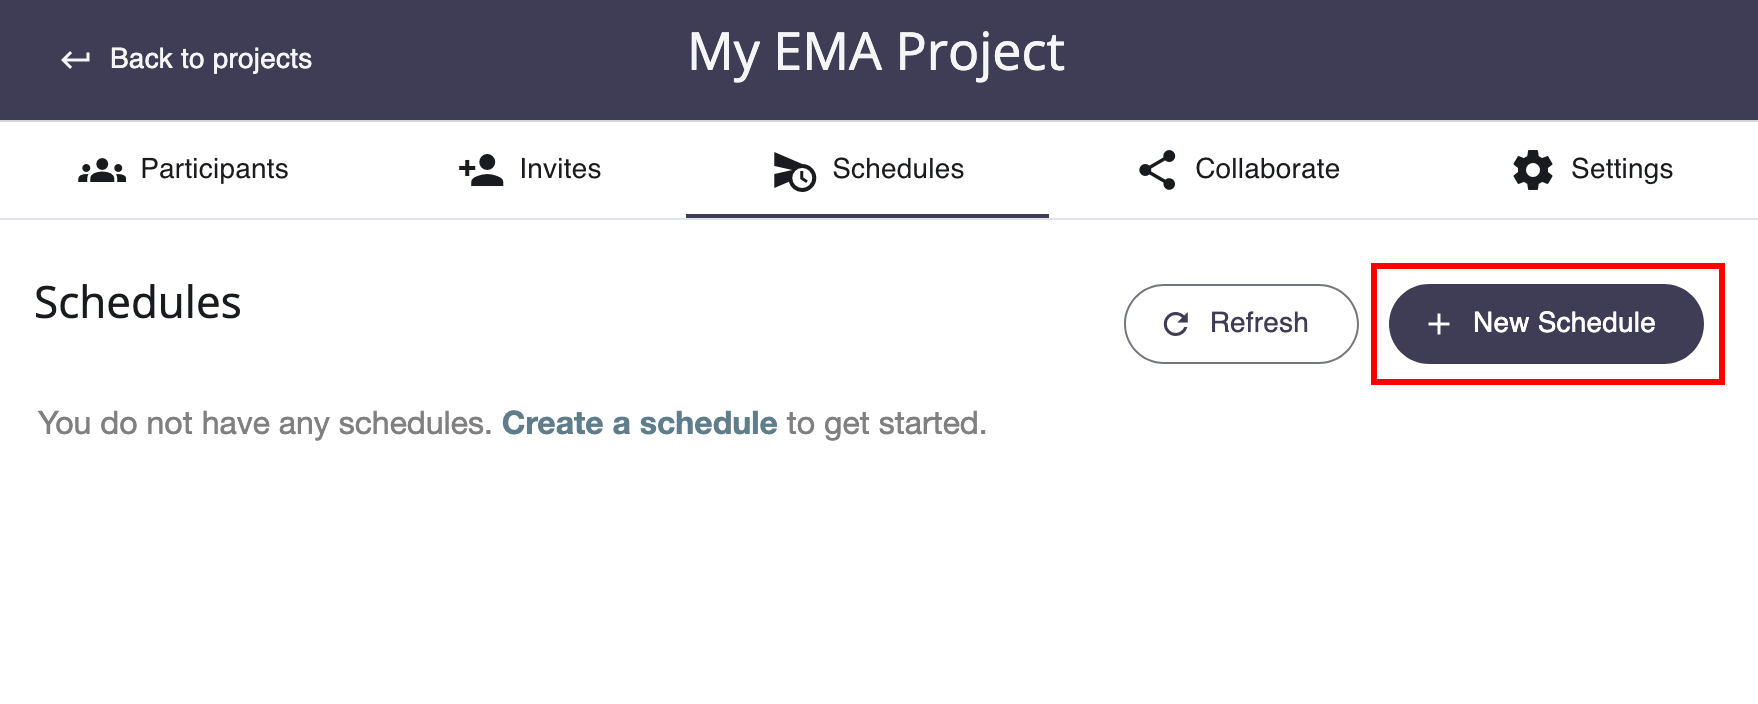
- Navigate to Projects > {Project Name} > Schedules and click the Create a schedule link.
- Select your desired schedule type
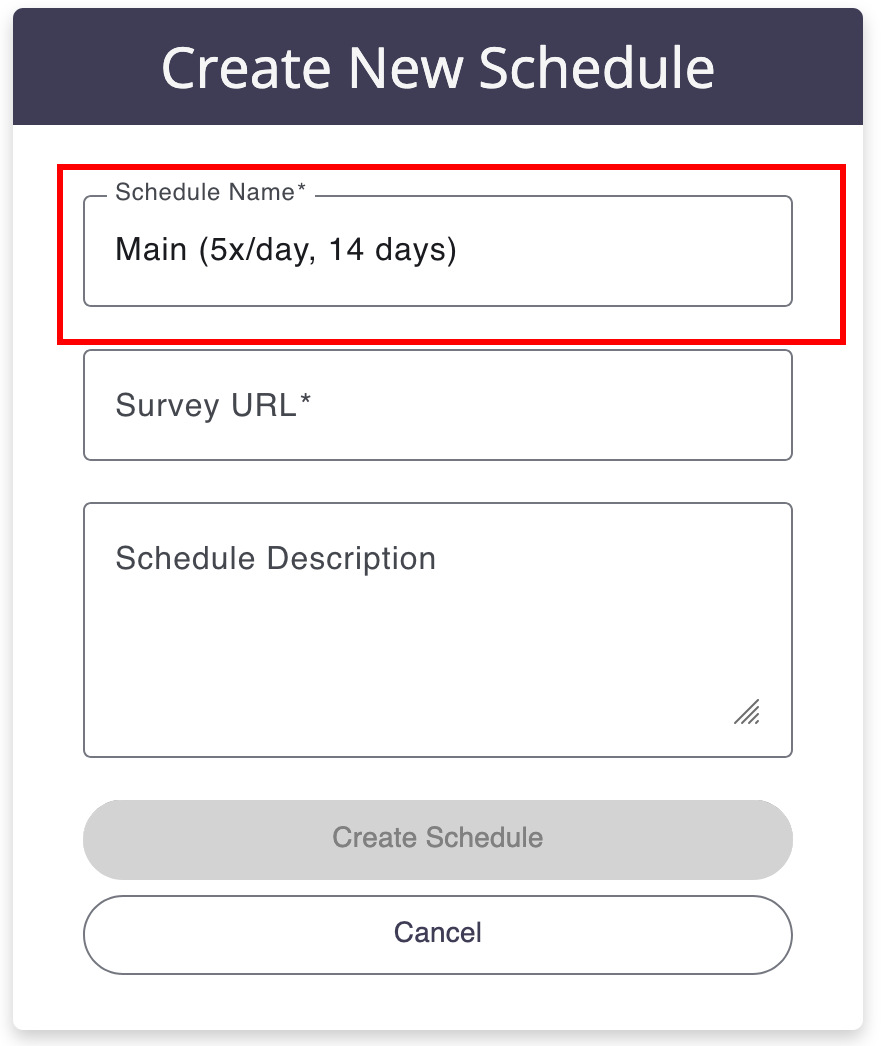
- Enter a name for the schedule. Only you and your collaborators will see this name.
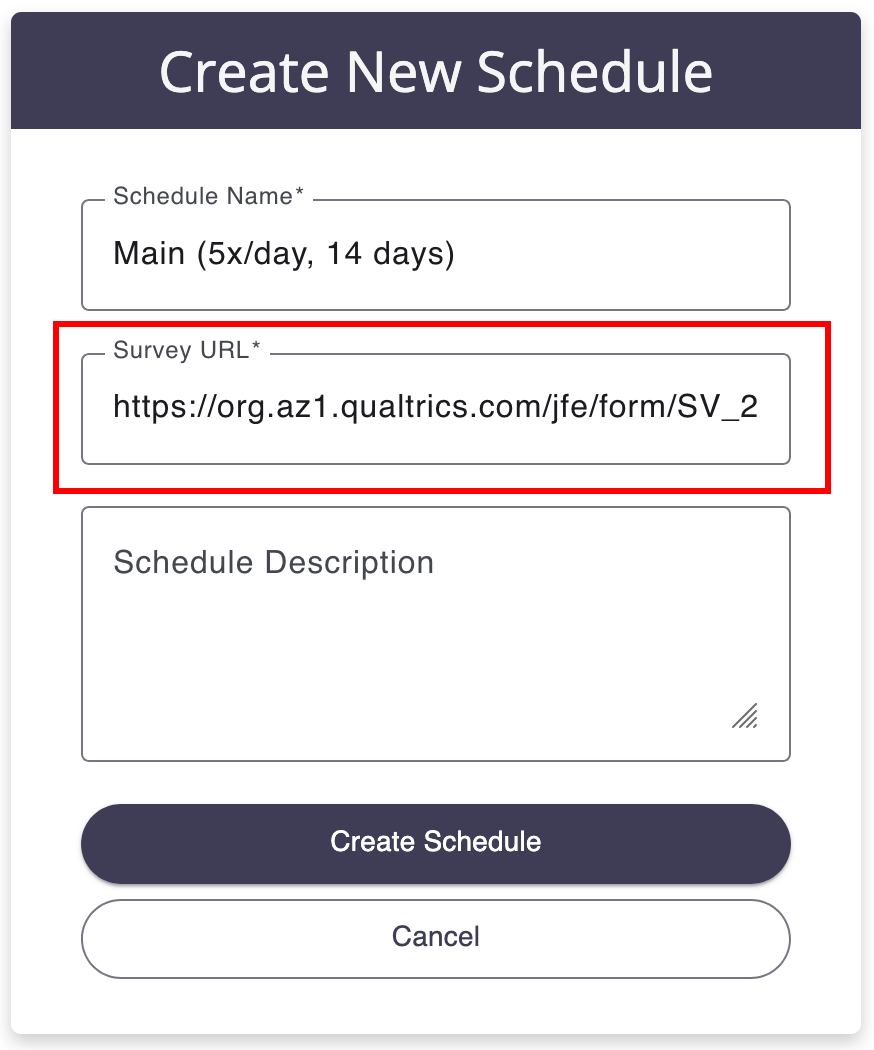
- Enter a Survey URL for the schedule. This is the base URL to the survey you want your participants to receive. You can also enter an optional schedule description to help you stay organized. This schedule description is only accessible by you and your collaborators.
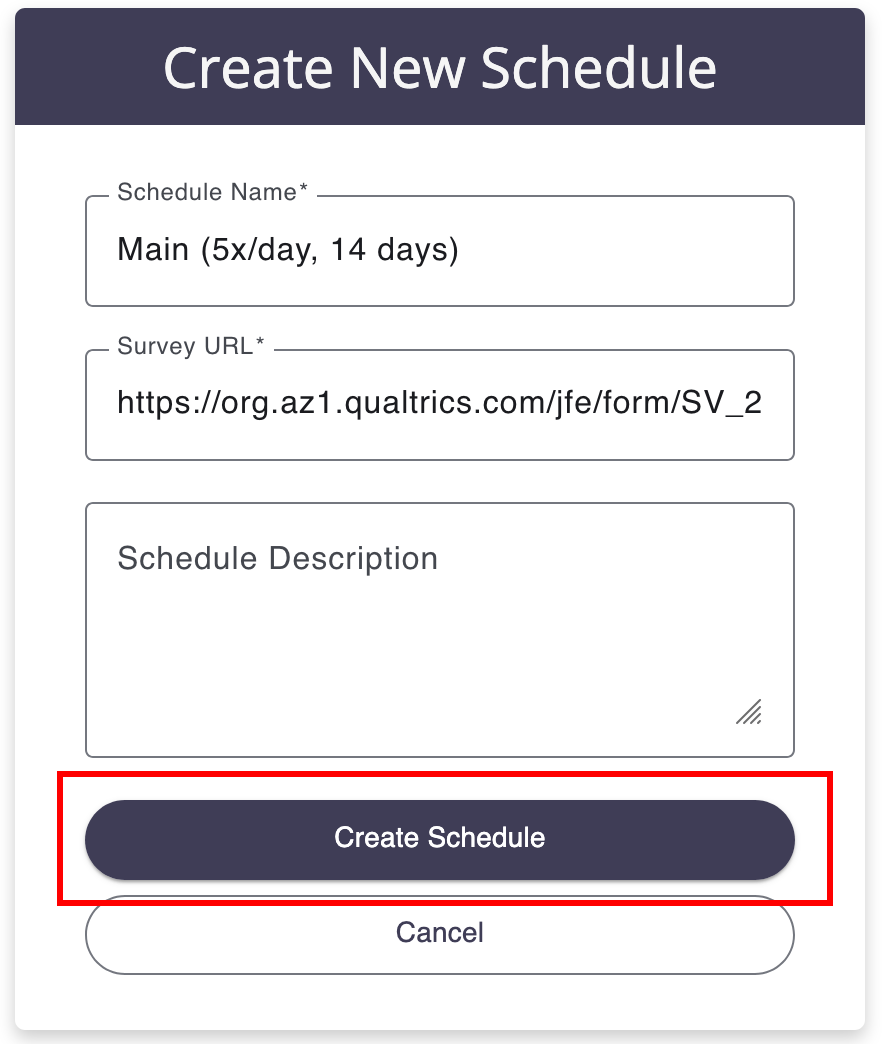
- Select Create Schedule create the ESM/EMA schedule
-
Automatic vs. Manual Schedule applicationDo you want to apply this schedule to all participants when they enroll? If yes, toggle this on (
 ).
If no, toggle this off (
).
If no, toggle this off ( ).
Manual schedule application is most useful when you have schedules you want to
apply
only to a subset of participants (e.g., participant-specific schedules,
experimental designs
with different assessment schedules in each arm).
).
Manual schedule application is most useful when you have schedules you want to
apply
only to a subset of participants (e.g., participant-specific schedules,
experimental designs
with different assessment schedules in each arm).
-
When to start sending pingsParticipants can start receiving pings immediately after they enroll in your study (defaults to the following day). Use this field to control when participants begin receiving pings. This is very useful in implementing measurement burst designs. For example, suppose you want to implement a design wherein you ping participants 5x/day for 14 days, wait 30 days, then ping again 5x/day for 14 days. To automate this within Inclivio, you would create two ESM/EMA schedules, one that begins 1 day after enrollment, the other that begins 45 days (15 + 30) after enrollment.
-
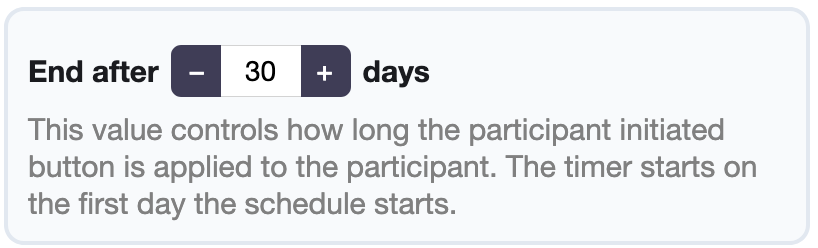
When to stop sending pingsHow many days do you want this schedule to run? Use this field to control the length of your schedule.
-
Conditions upon which to stop sending remindersChoose whether to send reminders until the participant clicks on their ping (i.e., is routed to the survey) or until they complete their survey. If 'Survey Complete'
-
Survey expirationUse this field to control when pings expire. When participants click on an expired ping, they are not redirected to the survey. Instead, they will reach a page informing them that the ping has expired.
-
Buffer between random pingsIf you are using a random interval design (i.e., sending pings randomly within pre-defined intervals of time), you may want to prevent pings from being sent too close together. Use this field to control the minimum amount of time random pings are separated by. If you attempt to create random pings with intervals larger than the value in this field you will receive a warning
"Exceeds minimum separation minutes". -
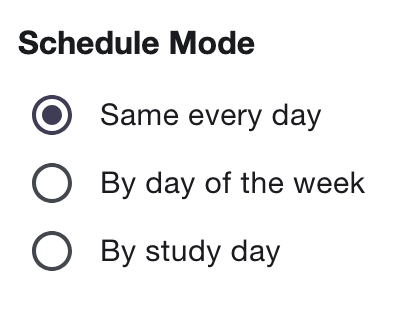
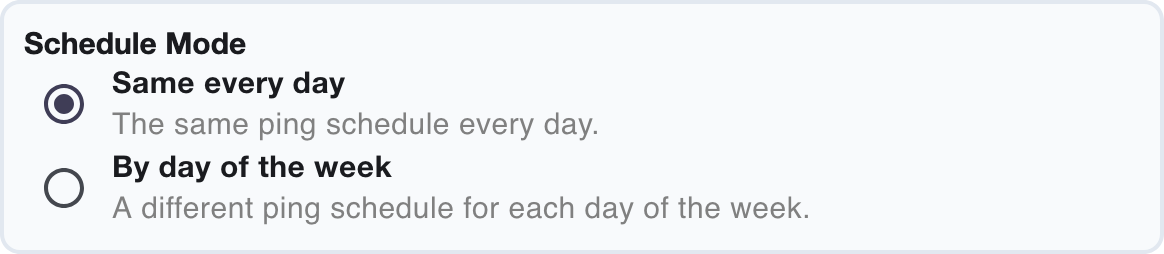
Schedule ModeThis field gives you control of when your pings are sent.
-
Select
Same every dayto send the same set of pings every day the schedule is applied. -
Select
By day of the weekif you want your pings to differ by day-of-the-week. This is useful, for example, if you want to send a different ping schedule on certain days of the week, or if you want to adjust the ping schedule to match sleep/wake times as they vary across the week. -
Select
By study dayfor full customization over the ping schedule. Allows you to set a unique ping schedule for every day the schedule is applied.
-
Select
-
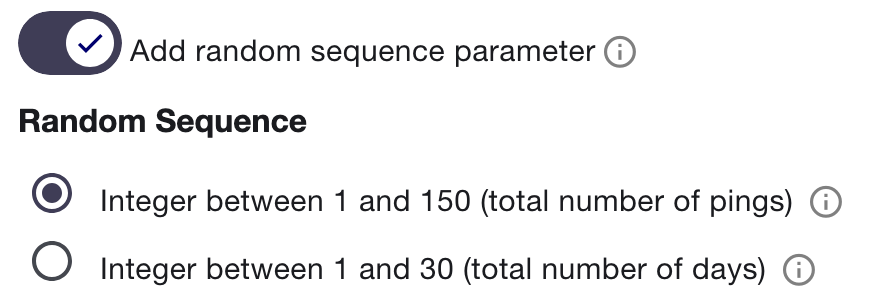
Random sequenceNumeric value used to implement within-person experimental designs, sent as a survey parameter.If
(total number of pings)is selected, a value between 1 and the total number of pings contained within that schedule will be sampled without replacement. If(total number of days)is selected, a value between 1 and the total number of days contained within that schedule will be sampled without replacement (if multiple pings per day, each will contain the samerandomSequenceon any given day).


-
Automatic vs. Manual Schedule applicationDo you want to apply this schedule to all participants when they enroll? If yes, toggle this on ().
If no, toggle this off ().
Manual schedule application is most useful when you have schedules you want to
apply
only to a subset of participants (e.g., participant-specific schedules,
experimental designs
with different assessment schedules in each arm).
-
When to start sending pingsParticipants can start receiving pings immediately after they enroll in your study (defaults to the following day). Use this field to control when participants begin receiving pings. This is very useful in implementing measurement burst designs. For example, suppose you want to implement a design wherein you ping participants 5x/day for 14 days, switch to daily assessment for 30 days, then ping again 5x/day for 14 days. To automate this within Inclivio, you would create three schedules:
- ESM/EMA schedule that begins 1 day after enrollment
- Longitudinal schedule that begins 15 days after enrollment
- ESM/EMA schedule that begins 45 days after enrollment
-
Schedule LengthHow many days do you want this schedule to run? Use this field to control the length of your schedule.
-
Survey expirationUse this field to control when pings expire. When participants click on an expired ping, they are not redirected to the survey. Instead, they will reach a page informing them that the ping has expired.
-
Buffer between random pingsIf you are using a random interval design (i.e., sending pings randomly within pre-defined intervals of time), you may want to prevent pings from being sent too close together. Use this field to control the minimum amount of time random pings are separated by. If you attempt to create random pings with intervals larger than the value in this field you will receive a warning
"Exceeds minimum separation minutes". -
Ping frequencyHow often do you want your pings to be sent? This field allows you to select across intervals of days, weeks, months, and years. If you select a frequency by weeks, you will additionally select the days-of-the-week you want your pings to be sent. The image below, for example, indicates a design wherein pings are only sent Monday-Friday.
-
Schedule ModeThis field gives you control over when your pings are sent.
-
Select
Same every dayto send the same set of pings every day the schedule is applied. -
Select
By weekdayif you want your pings to differ by day-of-the-week. This is useful, for example, if you want to send pings only on certain days of the week (e.g., intensive longitudinal data only on weekends).
-
Select
-
Random sequenceNumeric value used to implement within-person experimental designs, sent as a survey parameter. If
Noneis selected, this value is left blank. IfAll Pingsis selected, a value between 1 and the total number of pings contained within that schedule will be sampled without replacement. IfAll Daysis selected, a value between 1 and the total number of days contained within that schedule will be sampled without replacement (if multiple pings per day, each will contain the samerandomSequenceon any given day).


-
Automatic vs. Manual Schedule applicationDo you want to apply this schedule to all participants when they enroll? If yes, toggle this on ().
If no, toggle this off ().
Manual schedule application is most useful when you have schedules you want to
apply
only to a subset of participants (e.g., participant-specific schedules,
experimental designs
with different assessment schedules in each arm) or schedules you plan to
activate/deactivate
based on participants' survey responses.
-
Survey expirationUse this field to control when pings expire. When participants click on an expired ping, they are not redirected to the survey. Instead, they will reach a page informing them that the ping has expired.
-
Buffer between random pingsIf you are using a random interval design (i.e., sending pings randomly within pre-defined intervals of time), you may want to prevent pings from being sent too close together. Use this field to control the minimum amount of time random pings are separated by. If you attempt to create random pings with intervals larger than the value in this field you will receive a warning
"Exceeds minimum separation minutes".
-
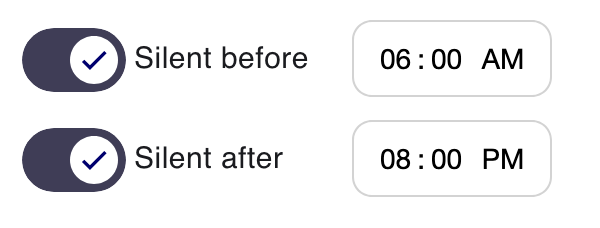
Silent PingsBecause dynamic schedules are designed to be event-contingent (rather than contingent on time-of-day), you do not know a priori what time of day pings from a dynamic schedule will be sent. If you wish to prevent pings being sent at certain times, you can use these controls to do so. For example, pings silent after 8pm and silent before 6am will not be sent to the participant during these hours. If you only toggle one of these options, the interval will begin/end at midnight (non-inclusive). For example, if you select silent before 6am, pings can be sent anytime 6am to 11:59pm.
-
Automatic vs. Manual Schedule applicationDo you want to apply this schedule to all participants when they enroll? If yes, toggle this on ().
If no, toggle this off ().
Manual schedule application is most useful when you have schedules you want to
apply
only to a subset of participants (e.g., participant-specific schedules,
experimental designs
with different assessment schedules in each arm).
-
When to start displaying the survey linkParticipants view the dashboard survey link on their Inclivio dashboard as soon as they enroll. Use this field to determine how long after schedule application you want the link to appear for your participants.
-
Schedule LengthHow many days do you want this schedule to run? Use this field to control the length of your schedule.
-
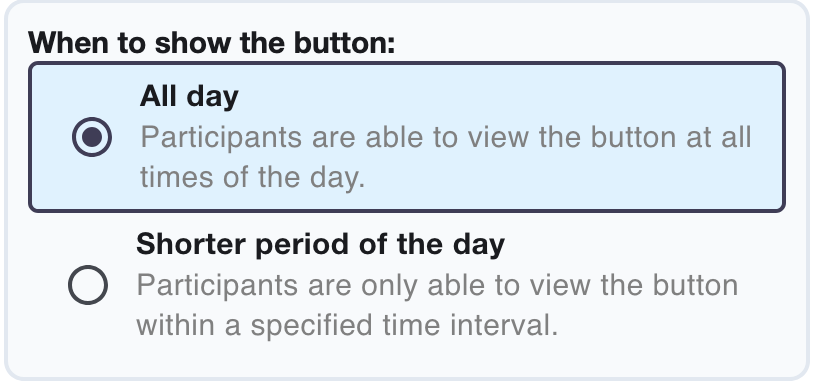
What time of day to display the survey linkUse this field to display/hide the survey link from participants at certain hours of the day. Leave it at its default to display all day.
-
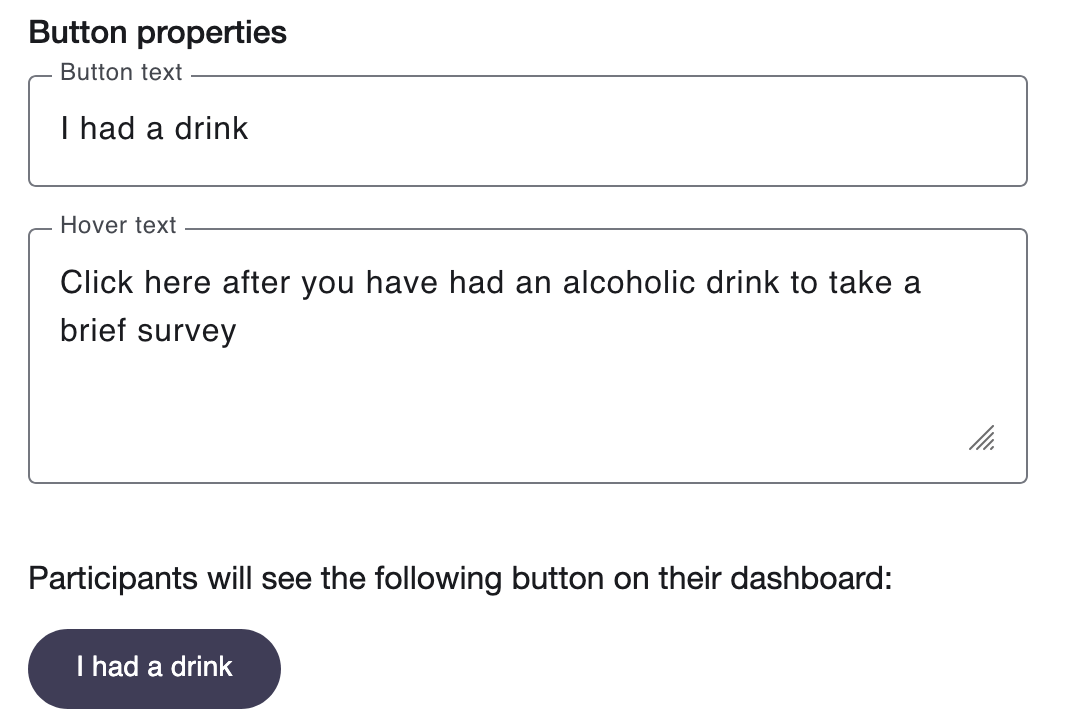
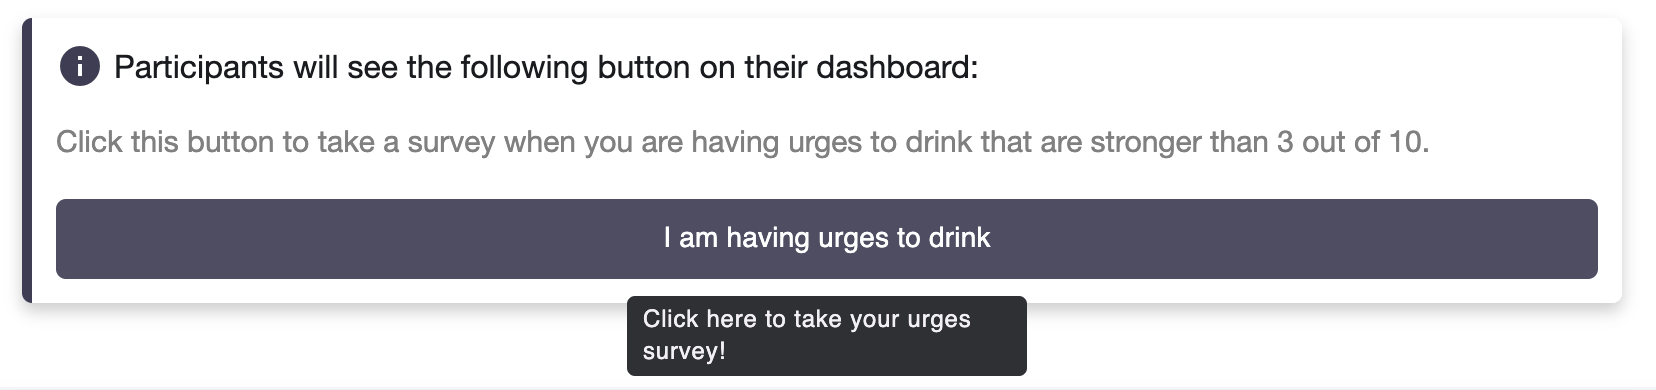
Survey Link CustomizationUse the 'Button text' field to control what participants see on their dashboard survey link. Use the 'Hover text' field to control what participants see when they hover over the dashboard survey link (desktop browsers only). For example, if you instruct participants to self-initiate a survey when they have urges to drink alcohol, you could use the following options:
-
Button text:
I am having urges to drink -
Button instructions:
Click this button to take a survey when you are having urges to drink that are stronger than 3 out of 10. -
Hover text:
Click here to take your urges survey!
-
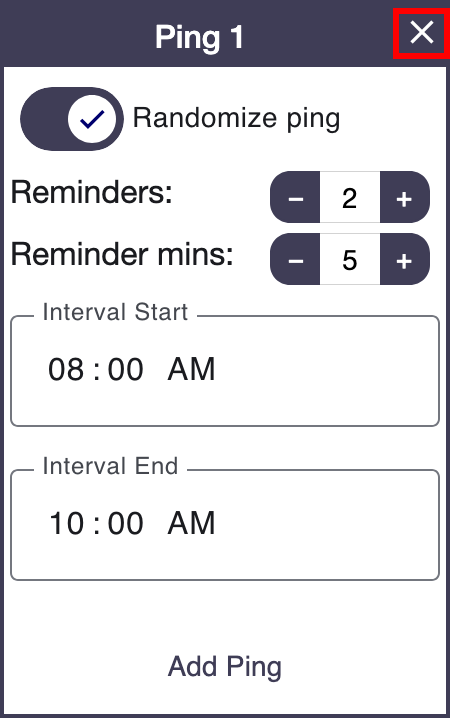
Button text:
delete
button at
the bottom.
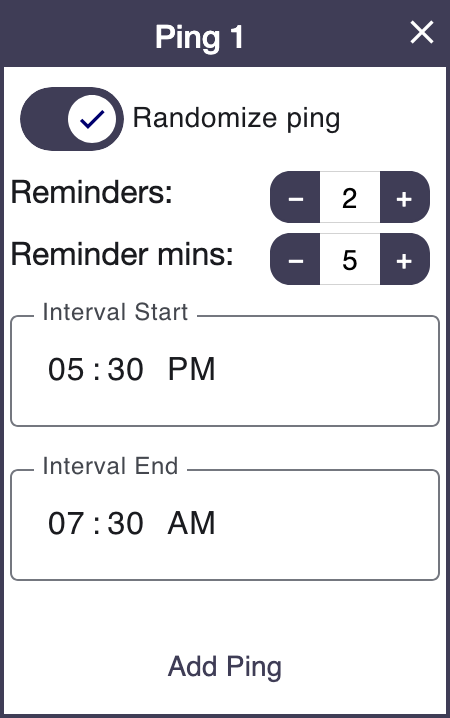
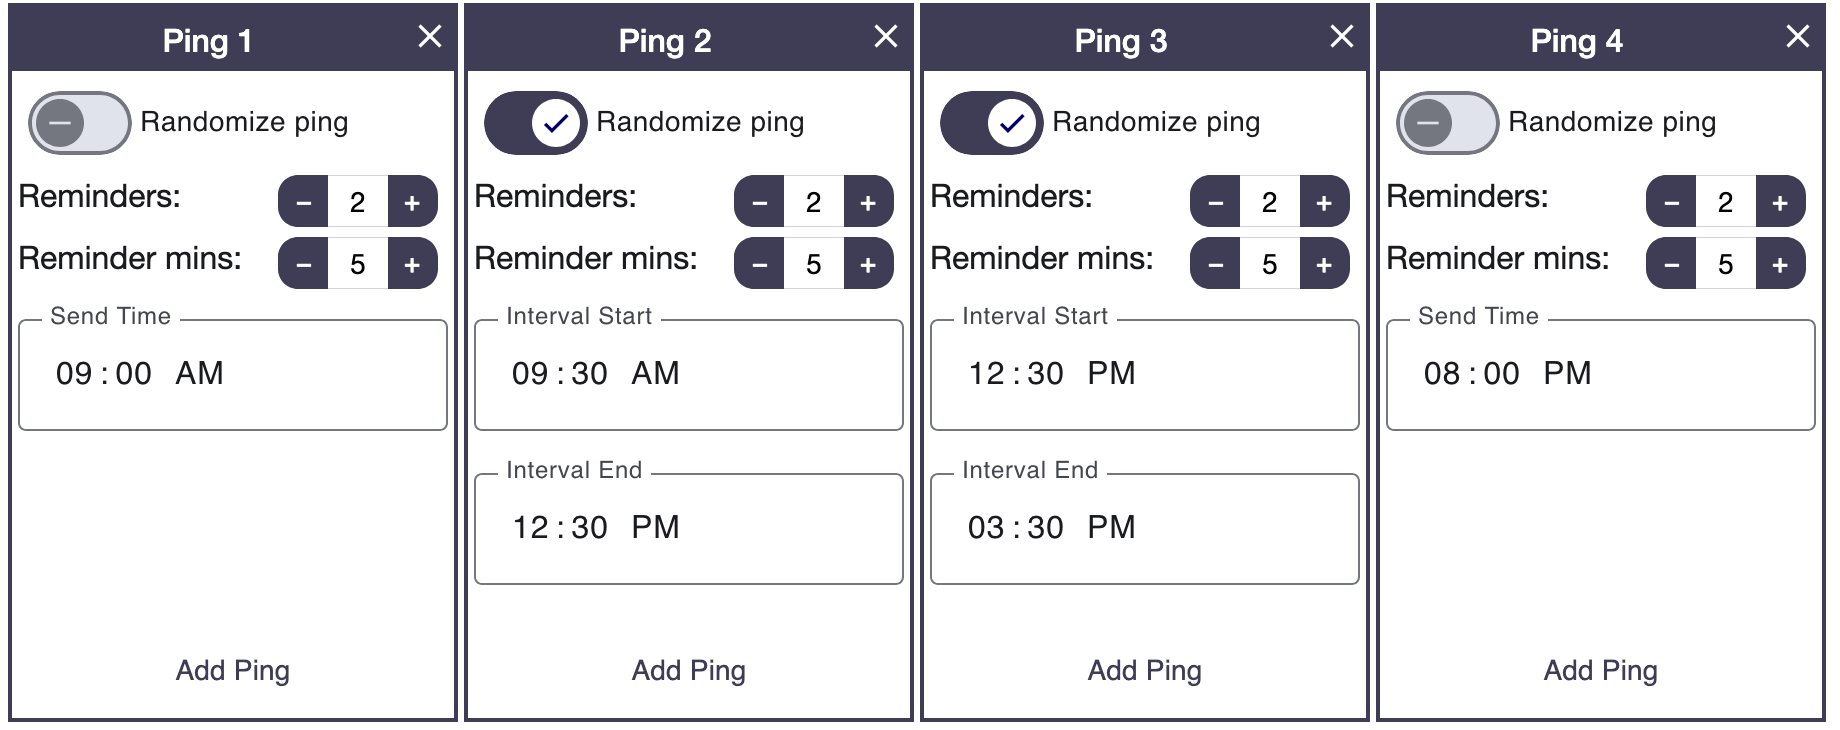
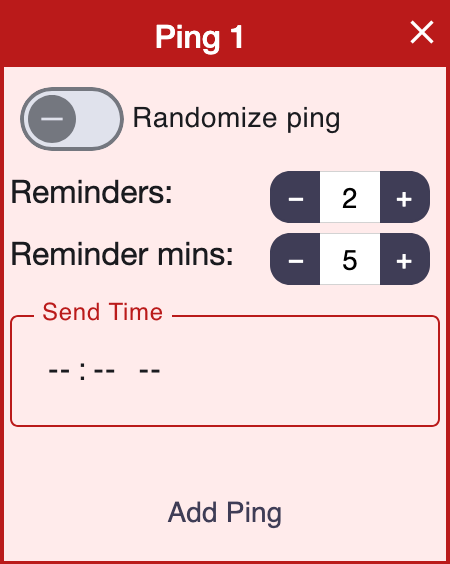
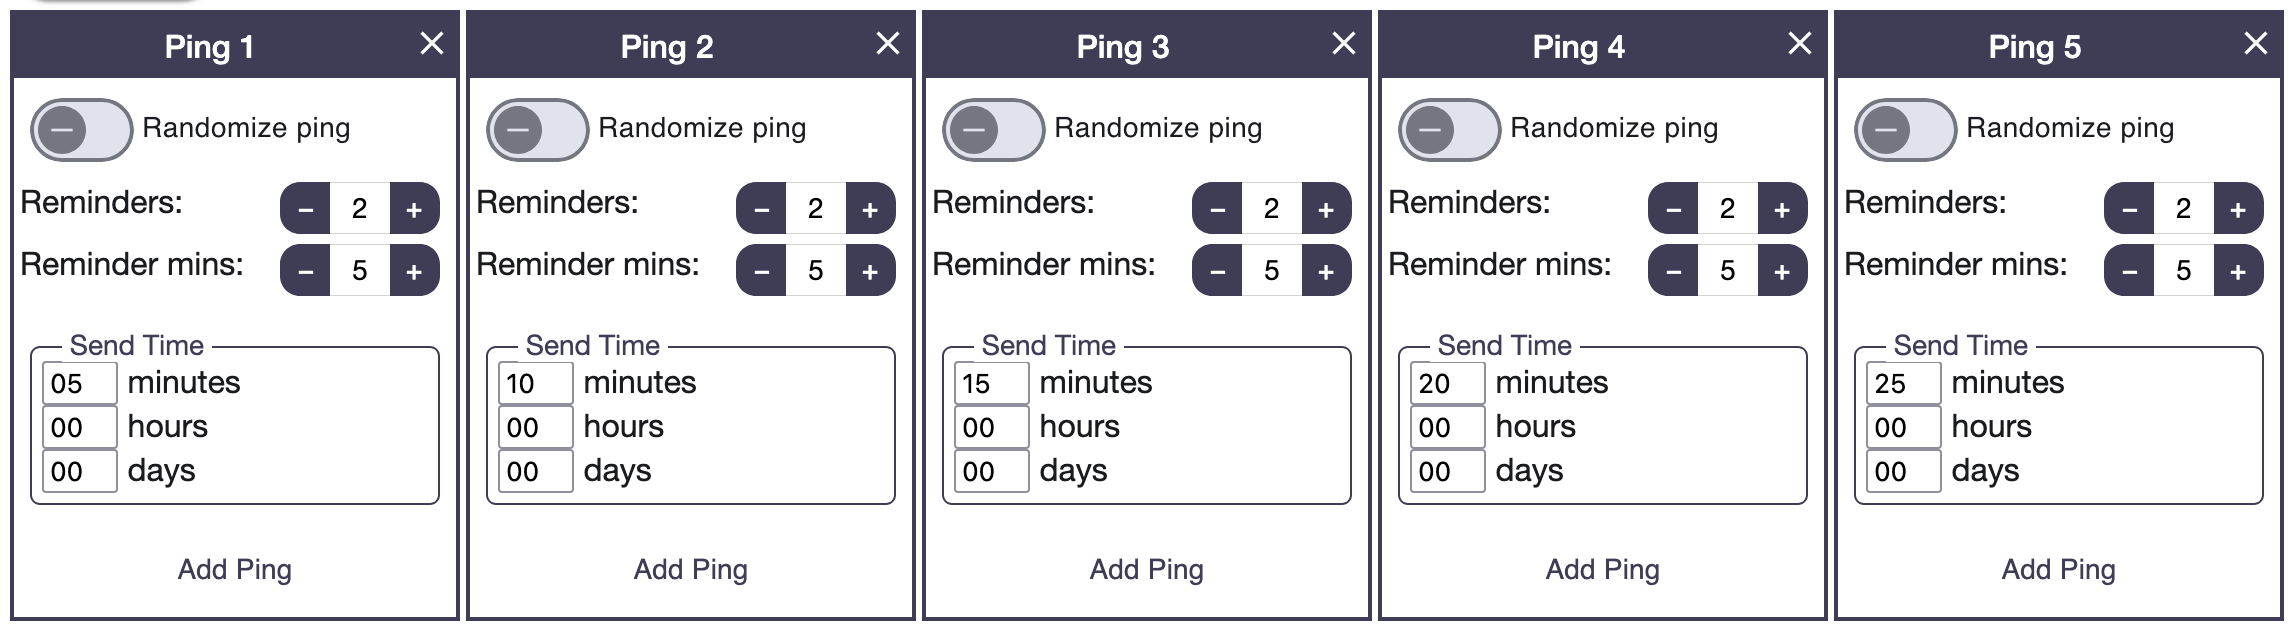
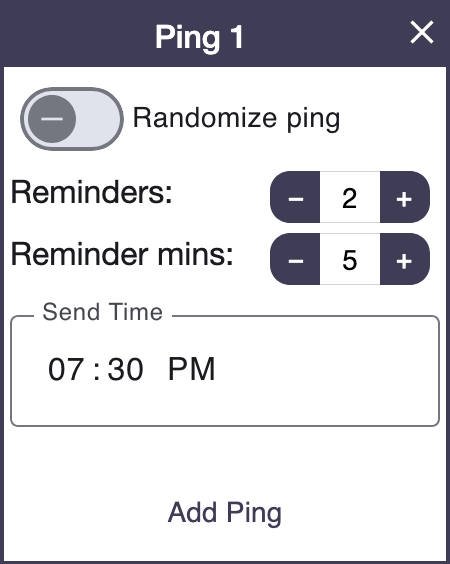
Randomize ping toggle is not activated below
().
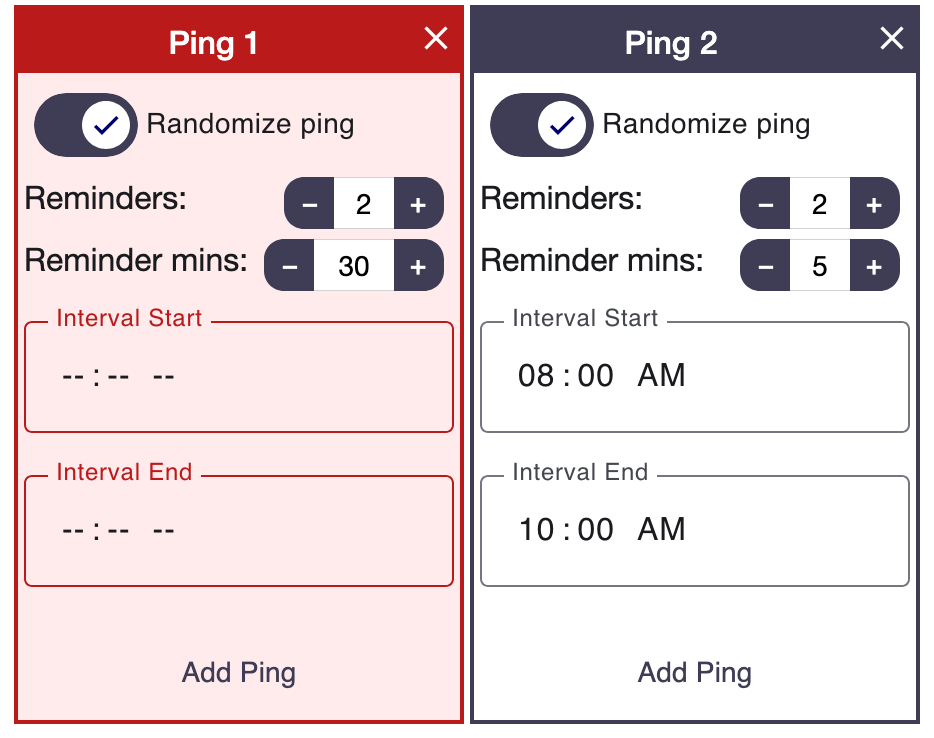
Randomize ping toggle is activated ().